$ kubectl get configmap skywalking-swck-java-agent-configmap -n skywalking-swck-system -oyaml apiVersion: v1 data: agent.config: |- # The service name in UI agent.service_name=${SW_AGENT_NAME:Your_ApplicationName}
# Backend service addresses. collector.backend_service=${SW_AGENT_COLLECTOR_BACKEND_SERVICES:127.0.0.1:11800}
# Please refer to https://skywalking.apache.org/docs/skywalking-java/latest/en/setup/service-agent/java-agent/configurations/#table-of-agent-configuration-properties to get more details.
$ kubectl get configmap skywalking-swck-java-agent-configmap -n skywalking-swck-system -oyaml apiVersion: v1 data: agent.config: |- # The service name in UI agent.service_name=${SW_AGENT_NAME:Your_ApplicationName}
# Backend service addresses. collector.backend_service=${SW_AGENT_COLLECTOR_BACKEND_SERVICES:default-oap.default:11800}
# Please refer to https://skywalking.apache.org/docs/skywalking-java/latest/en/setup/service-agent/java-agent/configurations/#table-of-agent-configuration-properties to get more details.
4.2 设置自定义配置
在实际使用场景中,我们需要使用 Skywalking 组件监控不同的 java 应用,因此不同应用的探针配置可能有所不同,比如应用的名称、应用需要使用的插件等。为了支持自定义配置,注入器提供 annotation 来覆盖默认的全局配置。接下来我们将分别以基于 spring boot 以及 spring cloud gateway 开发的两个简单java应用为例进行详细说明,你可以使用这两个应用的源代码构建镜像。
1 2 3 4 5 6 7 8 9 10 11 12
# build the springboot and springcloudgateway image $ git clone https://github.com/dashanji/swck-spring-cloud-k8s-demo $ cd swck-spring-cloud-k8s-demo && make
# check the image $ docker images REPOSITORY TAG IMAGE ID CREATED SIZE gateway v0.0.1 51d16251c1d5 48 minutes ago 723MB app v0.0.1 62f4dbcde2ed 48 minutes ago 561MB
# load the image into the cluster $ kind load docker-image app:v0.0.1 && kind load docker-image gateway:v0.0.1
# get all injected pod $ kubectl get pod -A -lswck-java-agent-injected=true NAMESPACE NAME READY STATUS RESTARTS AGE gateway-system demo-gateway-5bb77f6d85-lt4z7 1/1 Running 0 69s springboot-system demo-springboot-7c89f79885-lkb5j 1/1 Running 0 75s
# view detailed state of the injected pod [demo-springboot] $ kubectl describe pod -l app=demo-springboot -n springboot-system ... Events: Type Reason Age From Message ---- ------ ---- ---- ------- ... Normal Created 91s kubelet,kind-control-plane Created container inject-skywalking-agent Normal Started 91s kubelet,kind-control-plane Started container inject-skywalking-agent ... Normal Created 90s kubelet,kind-control-plane Created container springboot Normal Started 90s kubelet,kind-control-plane Started container springboot
# view detailed state of the injected pod [demo-gateway] $ kubectl describe pod -l app=demo-gateway -n gateway-system ... Events: Type Reason Age From Message ---- ------ ---- ---- ------- ... Normal Created 2m20s kubelet,kind-control-plane Created container inject-skywalking-agent Normal Started 2m20s kubelet,kind-control-plane Started container inject-skywalking-agent ... Normal Created 2m20s kubelet,kind-control-plane Created container gateway Normal Started 2m20s kubelet,kind-control-plane Started container gateway
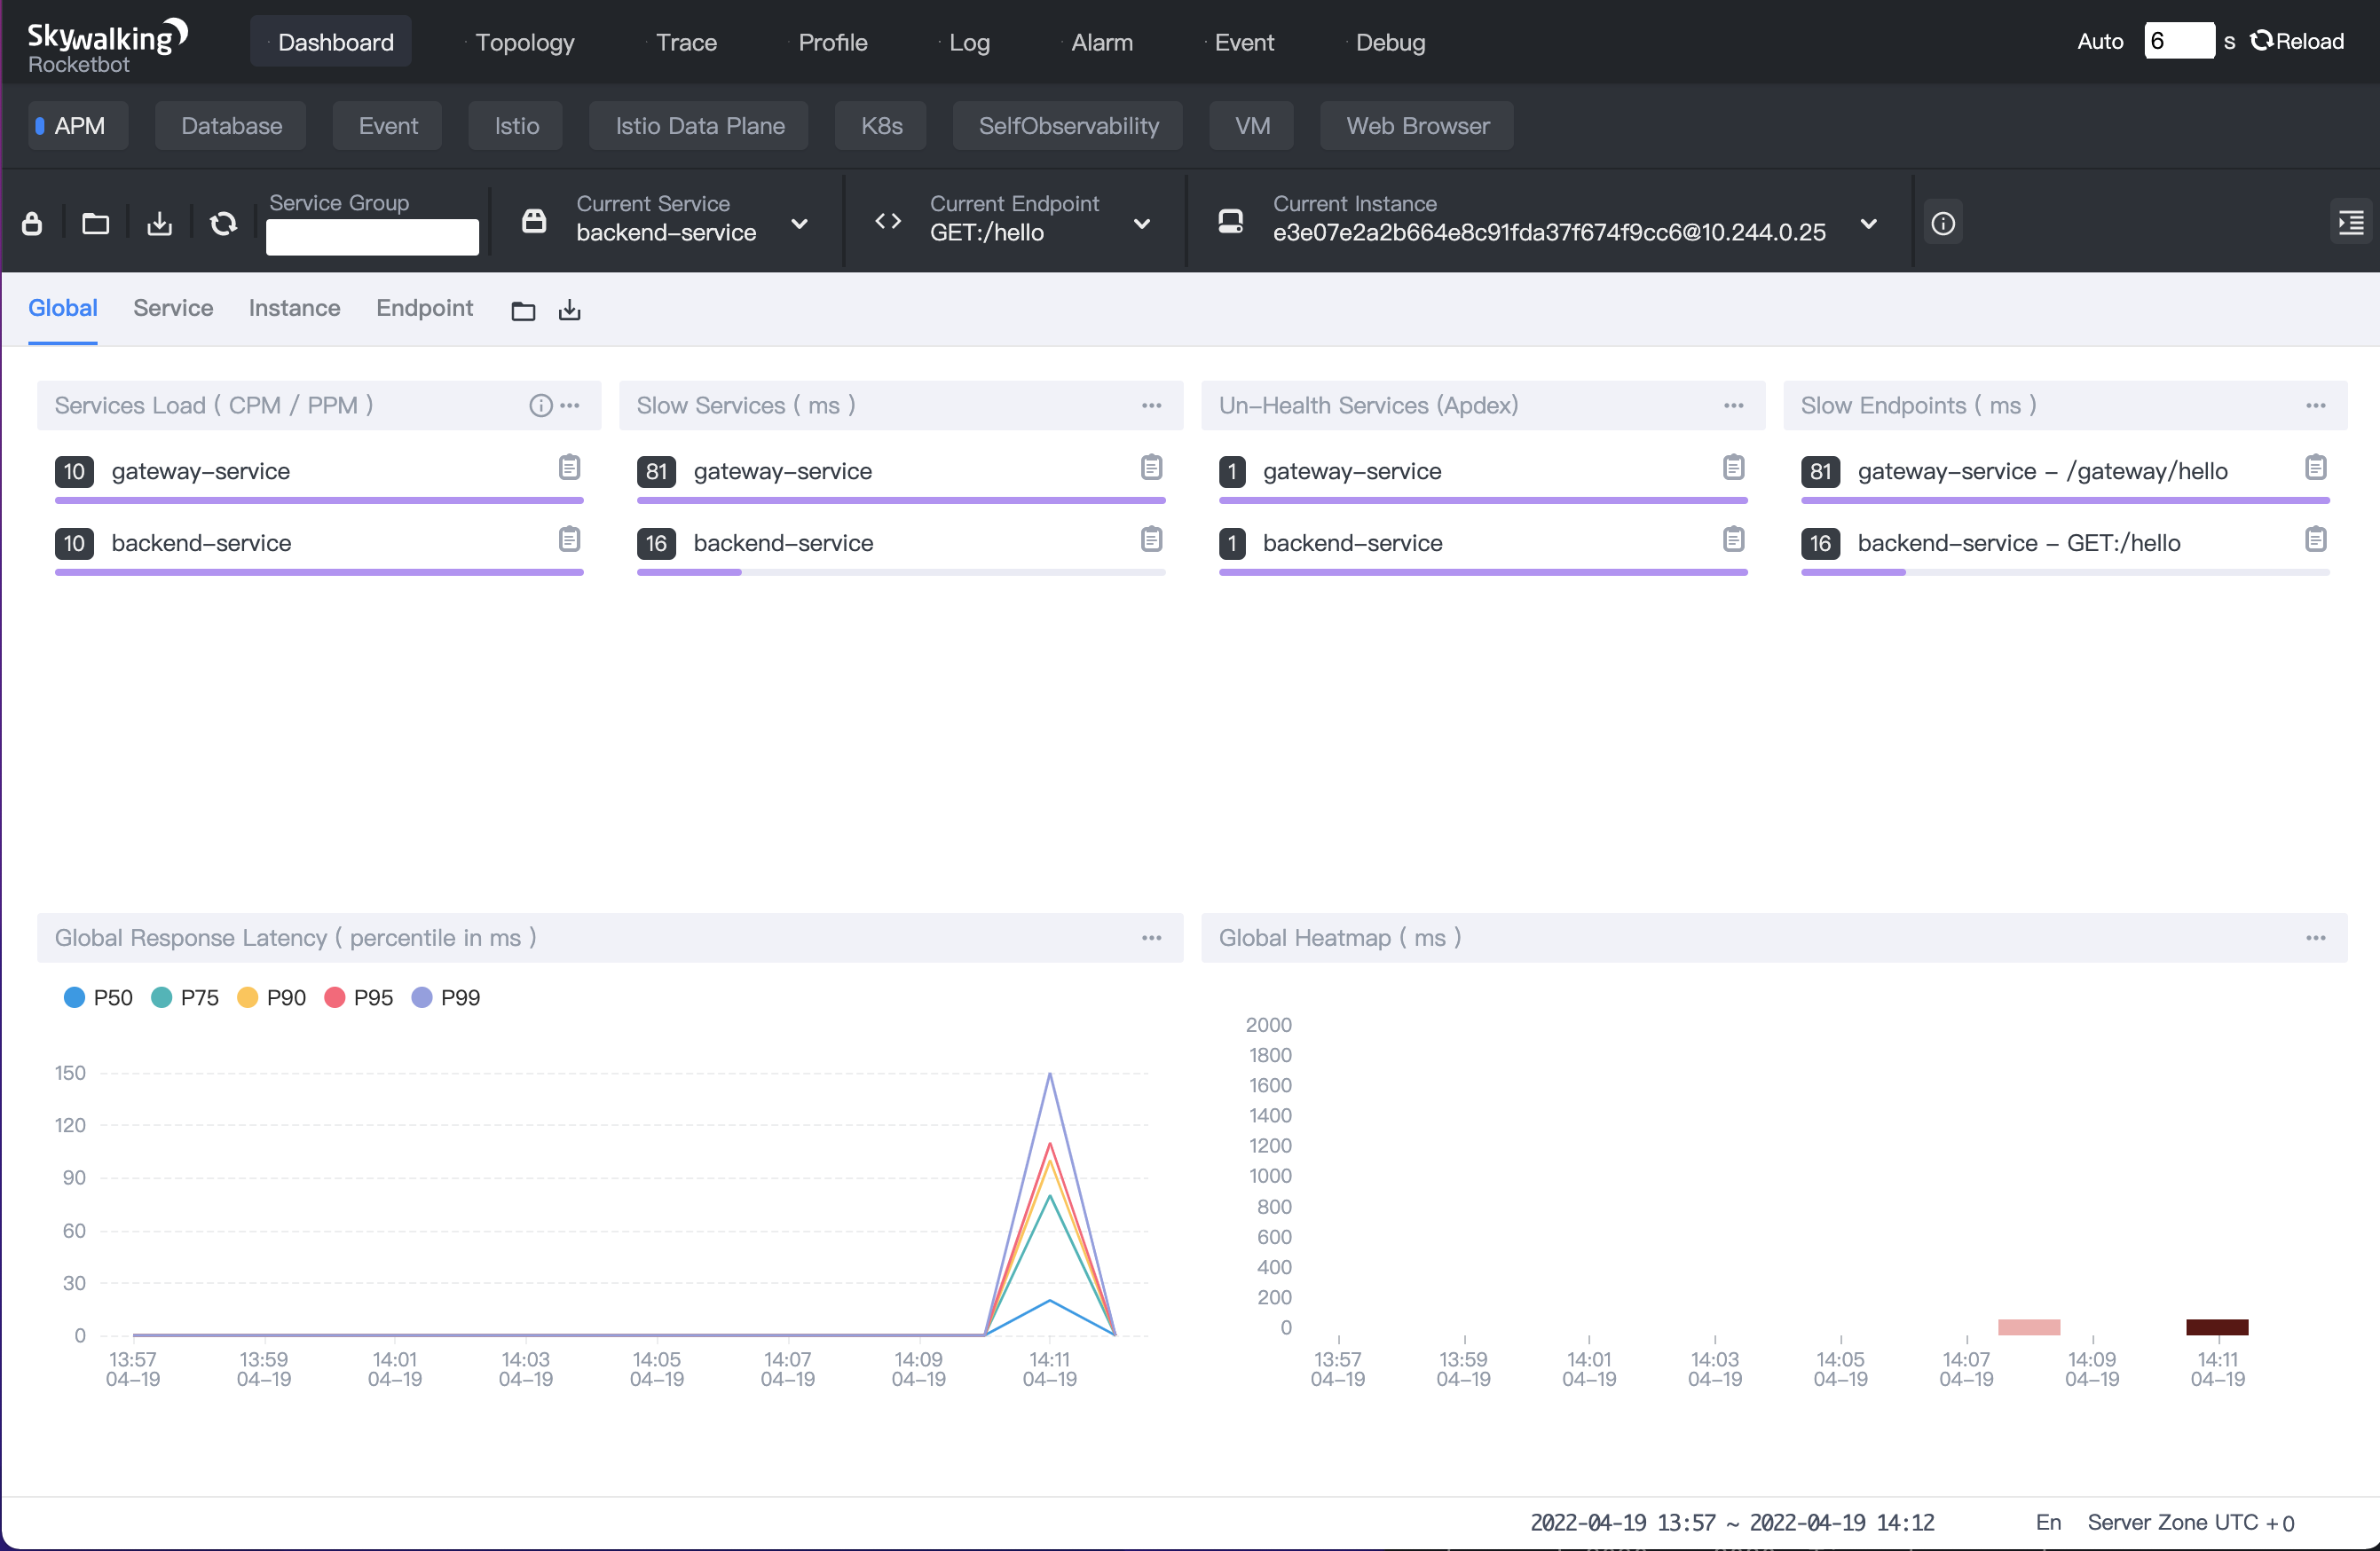
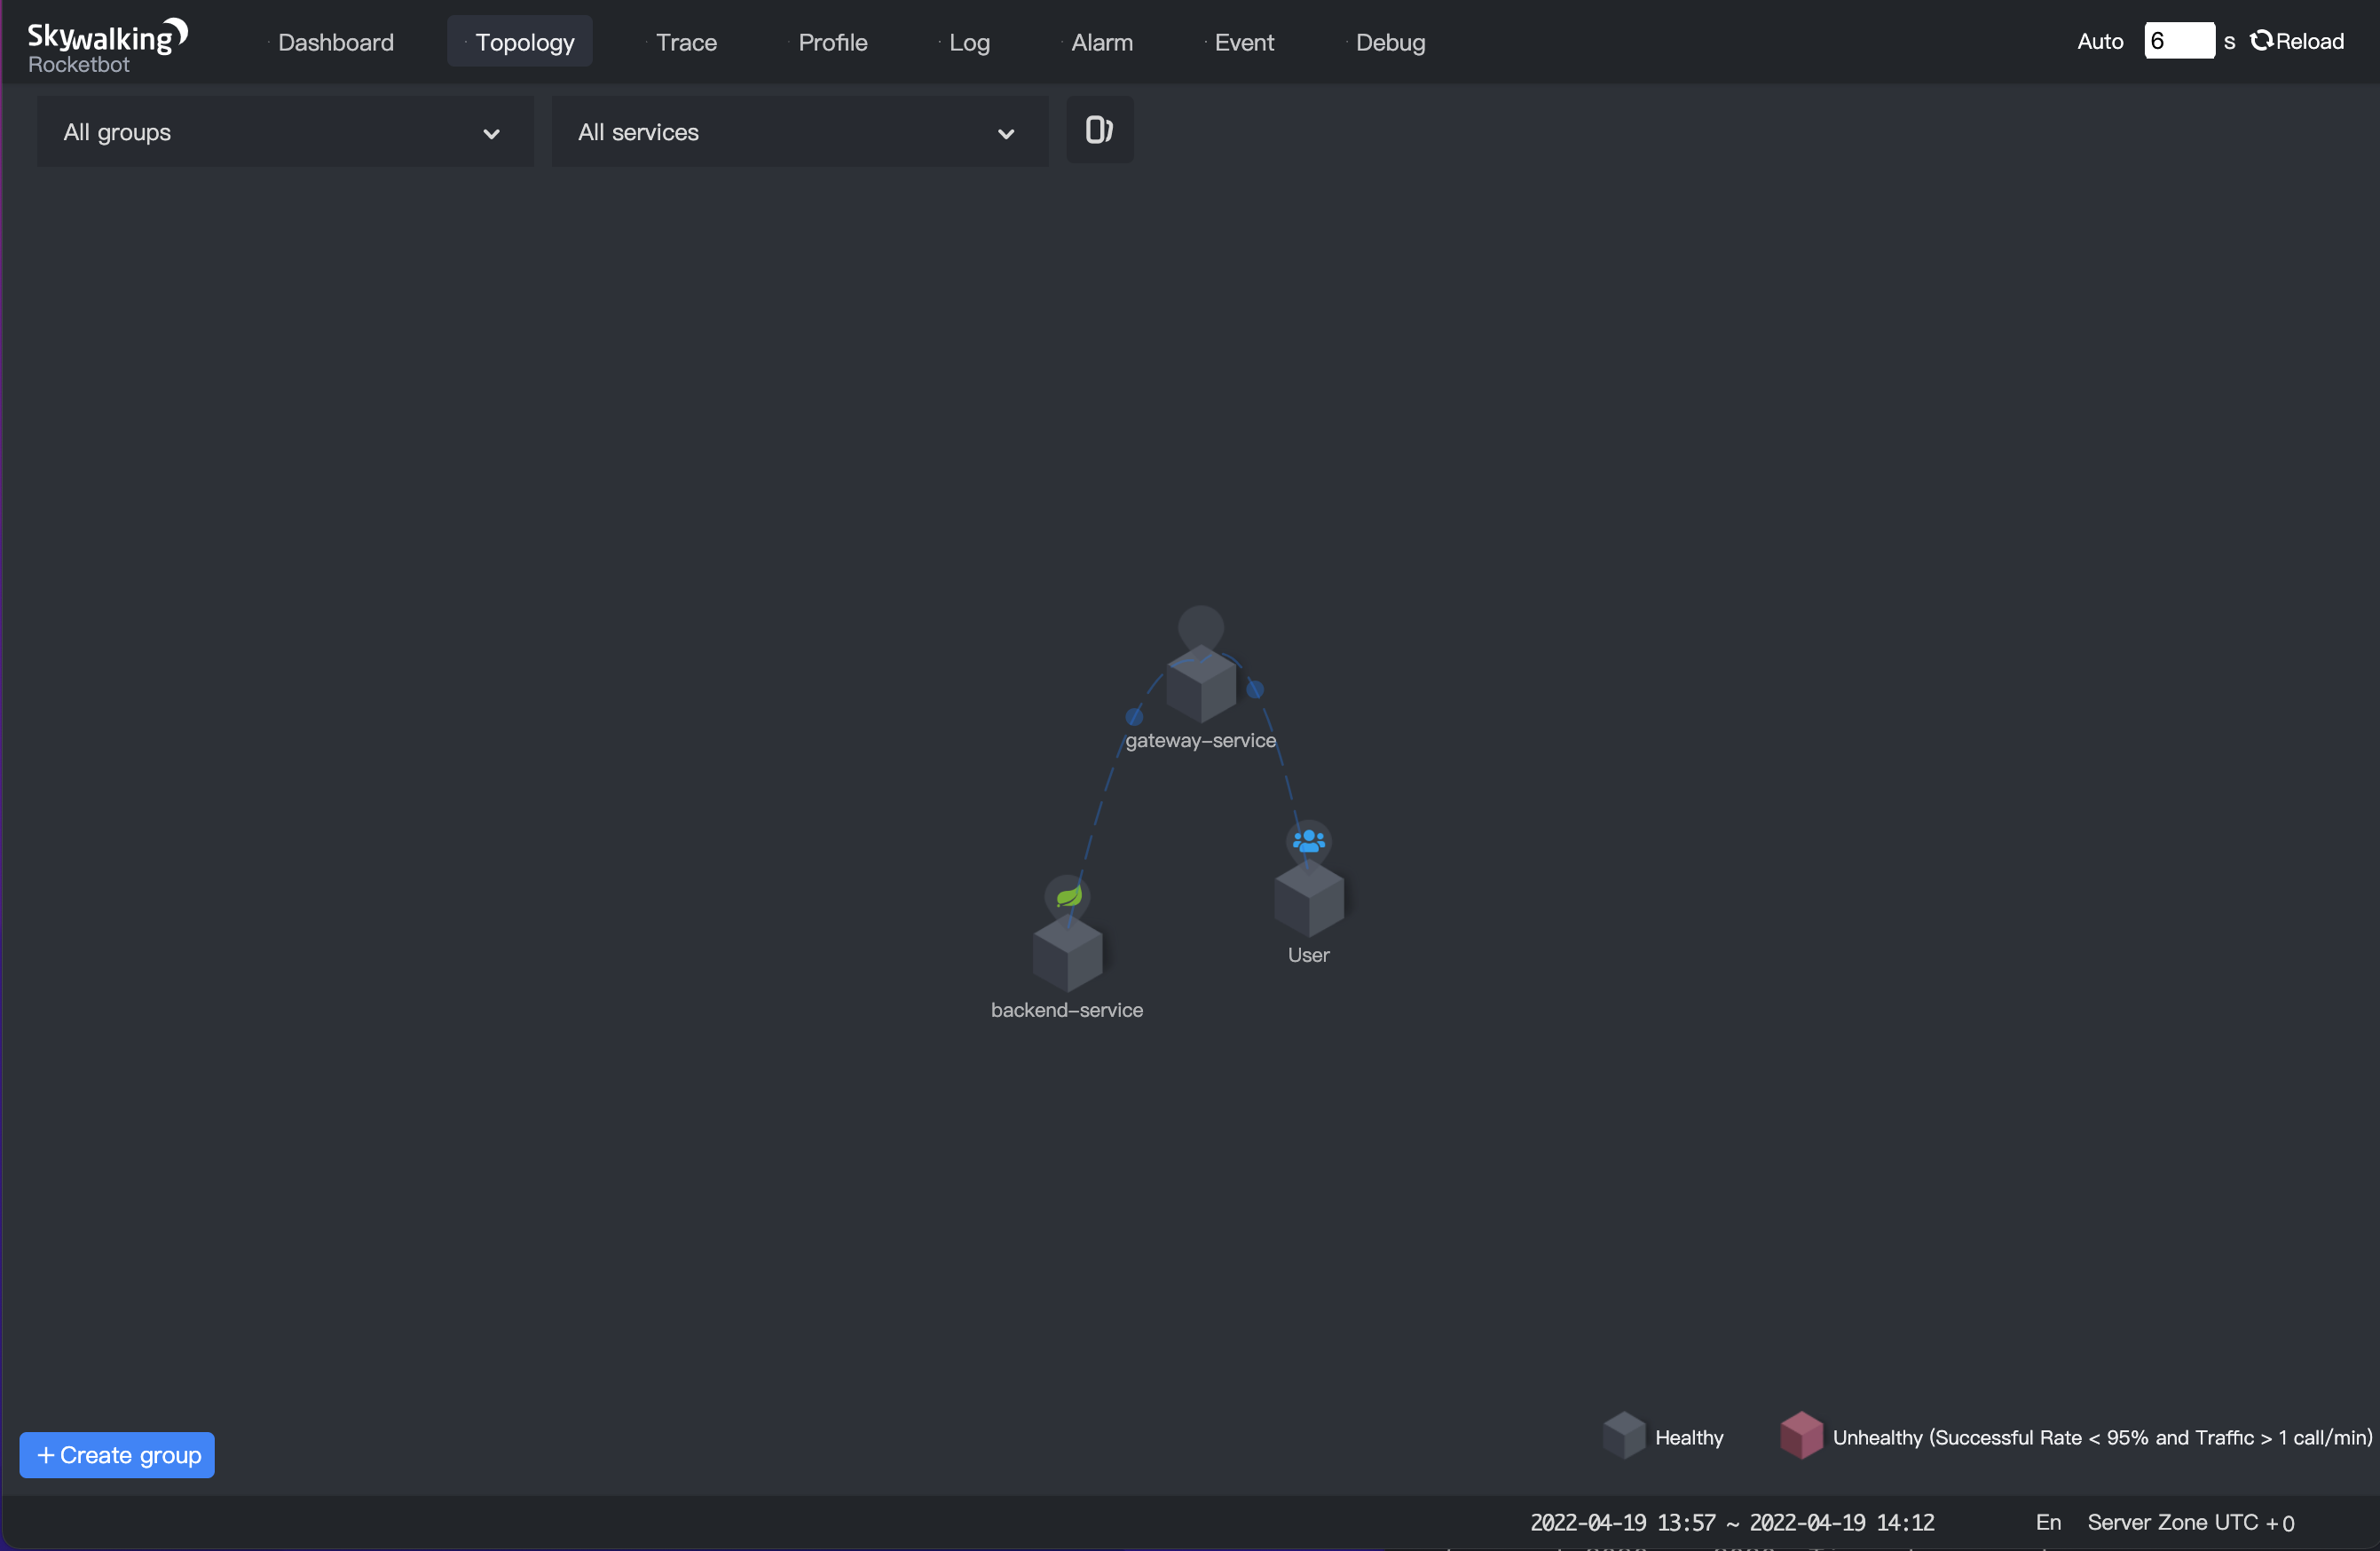
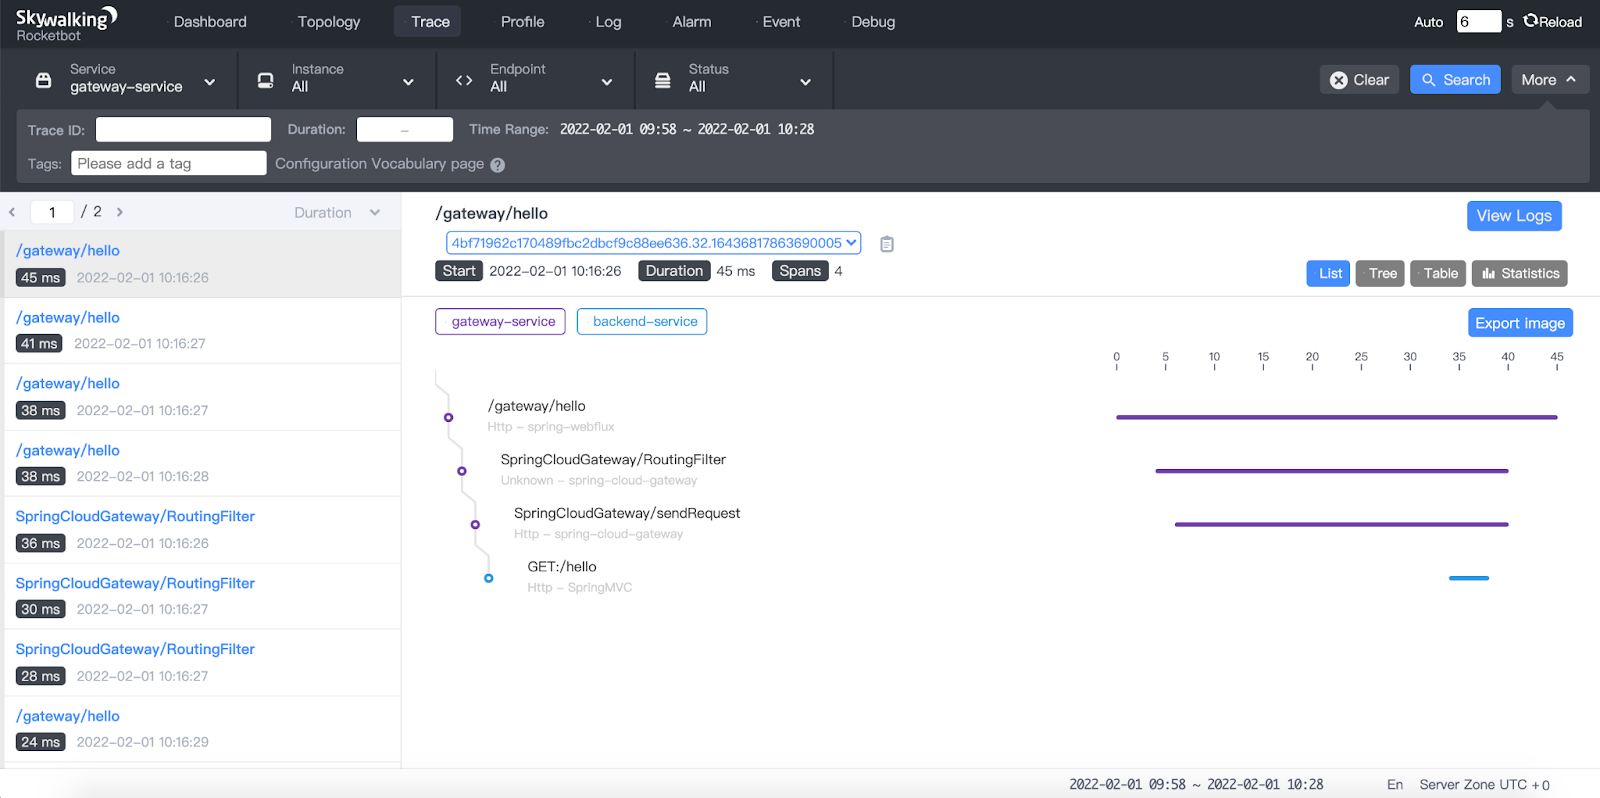
现在我们可以将服务绑定在某个端口上并通过 web 浏览器查看采样数据。首先,我们需要通过以下命令获取gateway服务和ui服务的信息。
1 2 3 4 5 6 7
$ kubectl get service service-gateway -n gateway-system
NAME              TYPE        CLUSTER-IP      EXTERNAL-IP   PORT(S)    AGE
service-gateway   ClusterIP   10.99.181.145   <none>        9999/TCP   9m19s

$ kubectl get service default-ui
NAME         TYPE        CLUSTER-IP      EXTERNAL-IP   PORT(S)   AGE
default-ui   ClusterIP   10.111.39.250   <none>        80/TCP    82m